The cold cathode installation and general terms is considered fundamental knowledge for all lighting and vehicle enthusiasts.
A cold cathode is not electrically heated by a filament and is used in neon lamps, vacuum tubes etc. and rely on the excitation of gas molecules to produce light – you can also find them as part of the components for backlighting LCD screens.
As a negatively charged component, be sure to take note of the installation process in its entirety, before you get started on your project.
This is a post originally written by Phil. I have edited it to make it a bit more broad.
If your specific question is not answered in this blog post, please take some time to search the blog for the answer. The topic of cathode installation has been covered many many times – chances are your question has already been answered.
And remember – it’s not as hard as it looks! Basic wiring and cathode/led/neon/glow installation is simple, and almost too easy once you’ve done it a couple times. So take some time to research and educate yourself, then give it a shot!
Cold Cathode Installation
IMPORTANT: Please read through this entire article before starting your car install. There are many important instructions and terms you should keep in mind. Safety first!
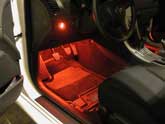
The following is geared towards Scions, but the concepts work in any car, boat, plane, etc. All the photos are from my friends beautiful white TC which I installed some red cathodes on.
Click on any of the images to view them fullsize!
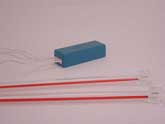
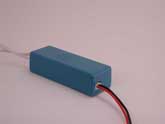
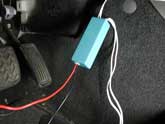
You start with the 2 cathodes and transformer. The cathodes plug into one side, and the red/black power wire plugs into the other side:
Powering your Cathodes
There are a few methods for getting power to the transformer:
1) Tap into the fuse box.
2) Tap into the back of the cigarette lighter.
3) Run a new wire from the car battery, through a rubber grommet in the firewall, and under the dash.
You must use a fuse!
Every electrical component in your car should be fused. A fuse protects valuable components as well as the wiring running to them. If a component malfunctions and tries to pull more current than the wire can handle, an un-fused wire can melt and possibly start a fire.
Each cathode kit draws about half an amp of current. It is recommend that you use a 2 to 3 amp fuse for 1 to a few kits. The fuse rating can be slightly higher than the combined amperage draw, but don’t use a 10 or 20 amp fuse!
The fuse should be placed as close as possible to the power source. If you are running a new wire directly from the battery, try to put an inline fuse – in a waterproof fuse holder – no more than 12 inches from the positive terminal.
Tap into the Fuse Box
There are likely 2 fuse boxes in your car: in the engine bay, and under the dash.
To install cathodes under the dash, it probably makes most sense to tap into the fuse box right there.
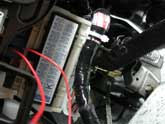
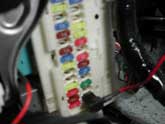
In the Scion TC, the fuse box is under the dash. You’ve gotta get on your back and stick your head under there to see it. This is what the cover panel looks like. It just pops right off:
There are two methods of tapping into the fuse box.
Method One: Ghetto-rig. While this method is not recommended, it will work. Twist a stripped wire onto a fuse lead before pushing it into the holder. Hopefully there are some empty slots in the fuse box. And hopefully they are already powered. Some are probably powered when the key is in the ON or ACC position, while other may be powered even when the key is not in the ignition.
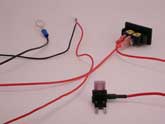
There are 2 sides to the holder of a fuse box. There is the side that is powered, and then there is the side that is fused. You must put the power wire into the fused side, otherwise the fuse does no good, for it is completely bypassed – connected directly to the powered side. To figure out which is which, you could carefully touch the power wire to either side of an empty fuse holder slot. Of course, you will need to ground the black wire. And if the cathodes light up, you have found the powered side. You can also use a multimeter if you have one available. (We recommend getting one anyway because it’s a very handy, safe tool!)
Put the power wire into the other side – the fused side, and push the fuse in. The lights should then light up… Because power is flowing from the powered side, through the fuse, and to the power wire of the cathodes.
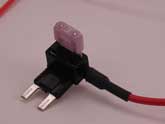
Method Two: Add-a-Circuit. You can buy something called an “Add-a-Circuit” which makes for a cleaner install. It is about $10 at your local auto parts store. You might have to try a few different stores until you can find it. It lets you tap into a slot which is already occupied by a fuse.
Tap into your Cigarette Lighter
For some installations, it might be easier to tap into the back wires of your cig plug. You can easily tap power and ground there. You could use a wire stripper to carefully strip part of the wire back, twist on your new wire, solder the connection, and then cover with electrical tape. Or you could try using some T-tap connectors, although they are not too reliable. The polarity (which is positive/which is ground) is not readily apparent when looking at the 2 wires coming out of the cig plug. If you can figure out which one goes to the inner “nipple” on the plug, you’ve found the positive. The ground wire goes to the outer metal “case” of the plug.
IMPORTANT: Now that you’ve determined what your positive power source is, you should remove any fuses or disconnect any power wires before proceeding. A loose power wire could surprise you at any moment if you are not careful. Better safe than sorry!
Ground your cathodes.
You need to ground the black wire coming out of the cathode transformer. Pretty much any metal part in the car which is connected to the chassis will work. You could use a factory grounding point, use another convenient bolt on BARE (non painted) metal, or you could drill your own hole somewhere and use a self-tapping screw.
You could just strip a fairly long portion of the black wire (maybe 2 inches) and wrap it around a metal bolt or part. But this isn’t too reliable.
Instead you can use an O-ring terminal and a crimp tool to crimp the wire. Then secure this ring to a metal point.
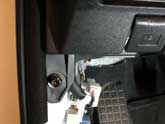
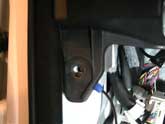
On your Scion tC, remove the driver side kick panel and there is a 10mm bolt revealed. Under the plastic is a nice metal grounding point.
To re-cap, you’ve connected the black wire to ground, and connected the red wire to your FUSED power source. By now, the cathodes should be lit.
Adding a Switch
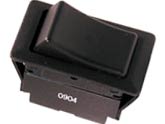
Next you probably want to add a switch so you can turn your cathodes on/off.
A switch cuts/connects the circuit. The most common switch has 2 metal prongs. Make sure your power wire is not connected to a power source, and ut your red power wire, strip back a bit on each end you just cut, and connect the 2 ends to your switch (you can add additional wire if your switch is not conveniently near your cathodes). When you reconnect all wires and flip the switch the cathodes should turn on/off.
You can either solder the wires to the switch prongs, or you can use female spade crimp terminals and a crimp tool.
Some switches are lighted switches, meaning they have a light that turns on when the switch is in the on position. If you want this feature, you must run a black ground wire from the GROUND terminal on the switch to your grounding point on the car. The other 2 terminals will be: constant power, and accessory power. Constant power goes to your fuse, and accessory power to your cathodes.
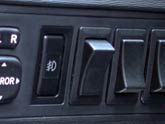
Here’s a switch that fits perfectly in the blank slots to the left of the steering column and makes for a nice clean install:
https://www.oznium.com/switches/gsw-45
Some basic skills you should be familiar with.
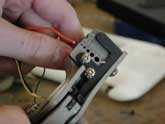
Stripping wire: Most of the wire you deal with in the car has strands of copper wound together, and a fairly durable plastic insulation. Some crazy people claim they can strip wire with their teeth! Otherwise you can use a sharp knife, a pair of wire cutters (takes some practice so you don’t end up just cutting the wire), or a pair of wire strippers made specifically for stripping different gauges (thicknesses) of wire.
Wire stripping tool:
Extending power wires: Cut the wire. Strip about half an inch of the wire on each end that you just cut. Find some new wire, cut it to the length that you want you extension to be. Strip both ends of this new wire. You now have 4 stripped ends of wires. Twist the wires together to create your “splice”. You can then solder the wires, and use heat shrink tubing or electrical tape to seal the connections. You could also use butt-connectors and a crimp tool.
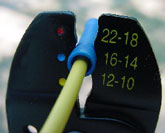
Crimping wires: Strip the wire about a quarter to half of an inch. Insert into the terminal (ring, spade, butt, etc). Insert the terminal into the crimp tool, and crimp! You should be using a REAL crimping tool (rather than pliers) so that you get reliable crimps. After crimping, pull a bit on the wire to make sure it is snug. Connectors come in all different varieties and sizes. For safety, look for the insulated ones.
Crimping tool:
By now you should have your fuse power wire running to a switch. The other end of the switch runs to your positive wire on your cathode transformer. The black wire of the cathode transformer is grounded.
Mounting your Cathodes
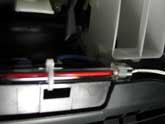
Mounting the transformer and cathode tubes is usually done with cable ties. There are plenty of things to “tie” them to under the dash. Play around with the placement and see which gives you the best lighting effect. Try to keep the tubes out of the way of feet and out of plain sight. Most of the time, it is better to see the diffused (while still BRIGHT) glow from the tubes, than the tubes themselves.
If you are mounting your cathodes in a different location where using cable ties is not an option, you can use a strong double-sided tape. Or, if you are installing cathodes to your headliner for example, you can even use fishing line! There are many options that can vary by installation. Just be creative.
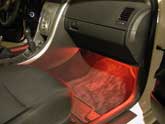
All lit up & beautiful!
Common Installation Mistakes & Pitfalls
Do not extend the white wires
Do not cut or extend the white wires which run between the cathode transformer and cathode tubes. These carry a low amperage, high voltage current. Extending them may cause the cathode tubes to flicker or stop working all-together!
If you want a cathode on each side of the dash, just buy two complete sets. You can of course, extend the red and black power wires to reach the battery, or other power source. If you need to extend the cathode tubes past the 11 inches, we suggest you buy either an extra set of cathodes, or buy an extra transformer.
Ready to buy?
Oznium.com: https://www.oznium.com/linear-lights
Cold Cathode Installation & General Terms

I have got a cold cathodes set that was from my son. He got them a long time ago and don’t know where the transformer for it is Been looking on here and can not find a place to buy one. can you help me?